


After you've been onboarded by our team and had your Corporate Accounts Portal (CAP) enabled, you will receive an invitation by email to activate your account.
To activate your account:
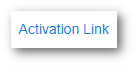
- Click on the Activation Link on the email.
- Enter a new password for your account.
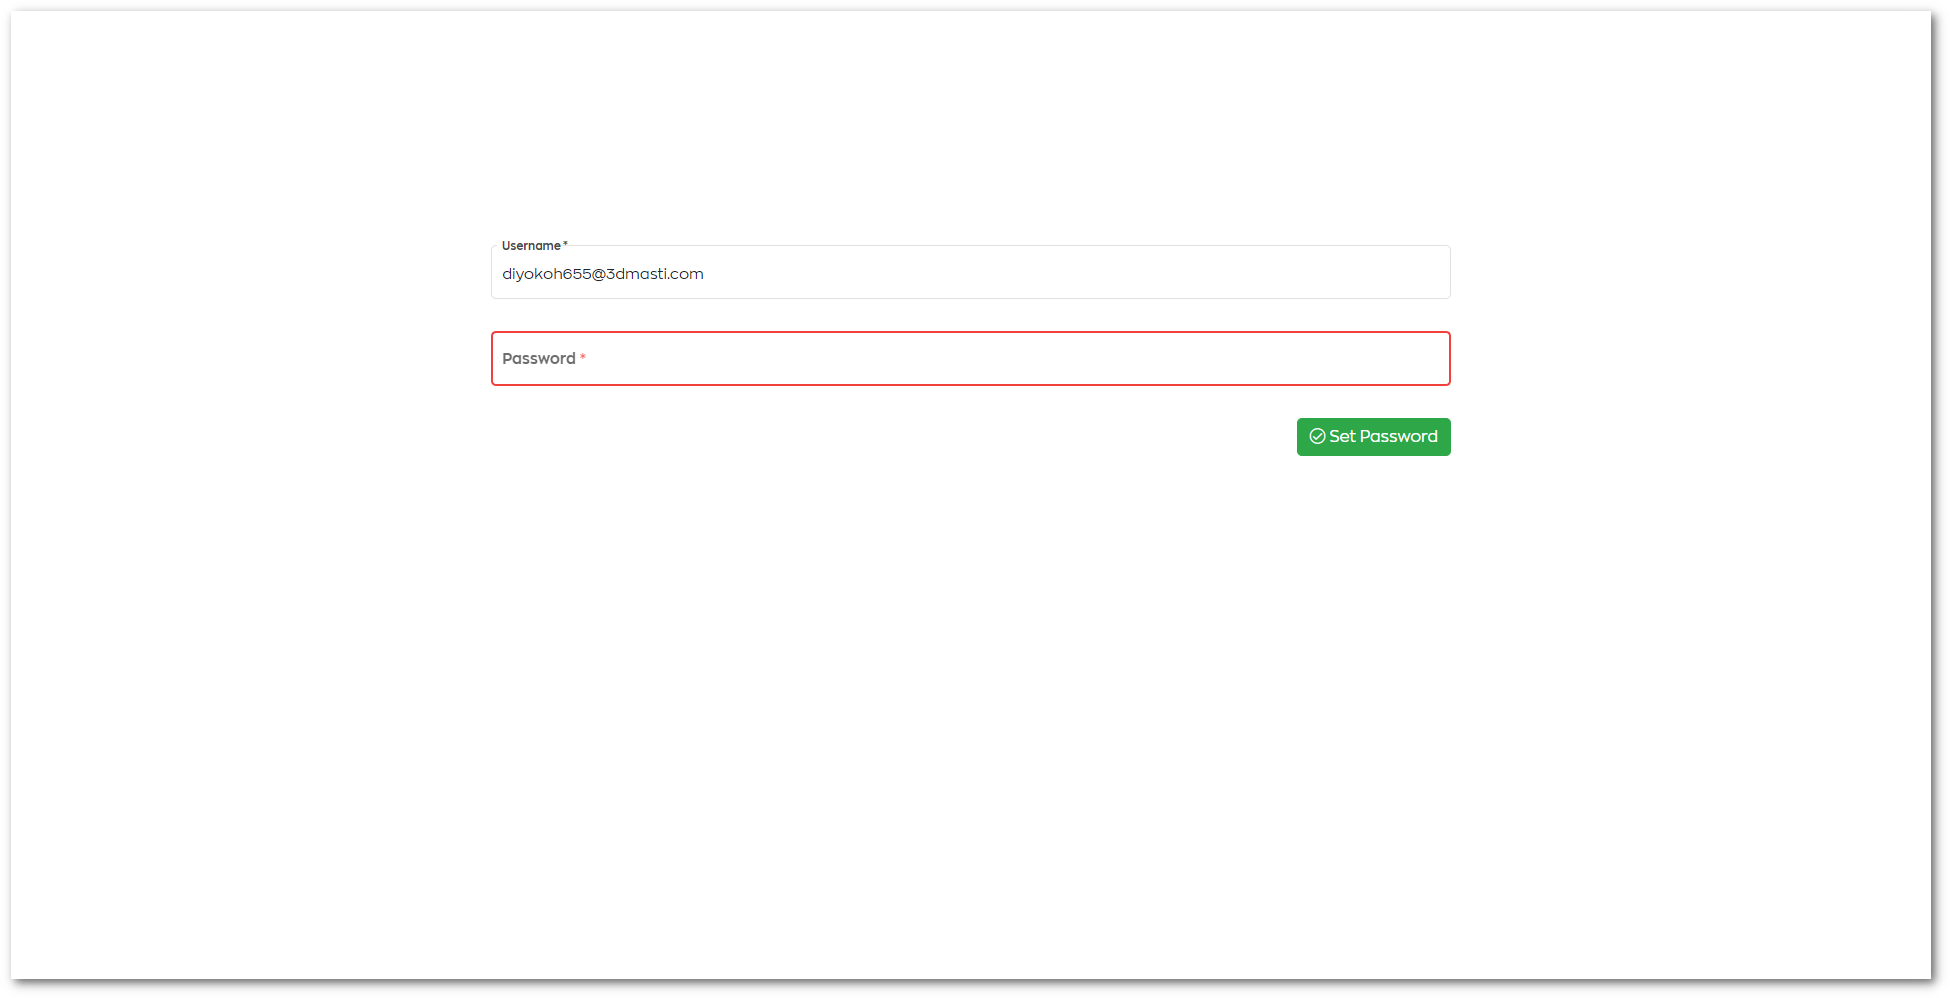
- Then click Set Password.
Once done you will be redirected to the login screen of the Accounts Portal.
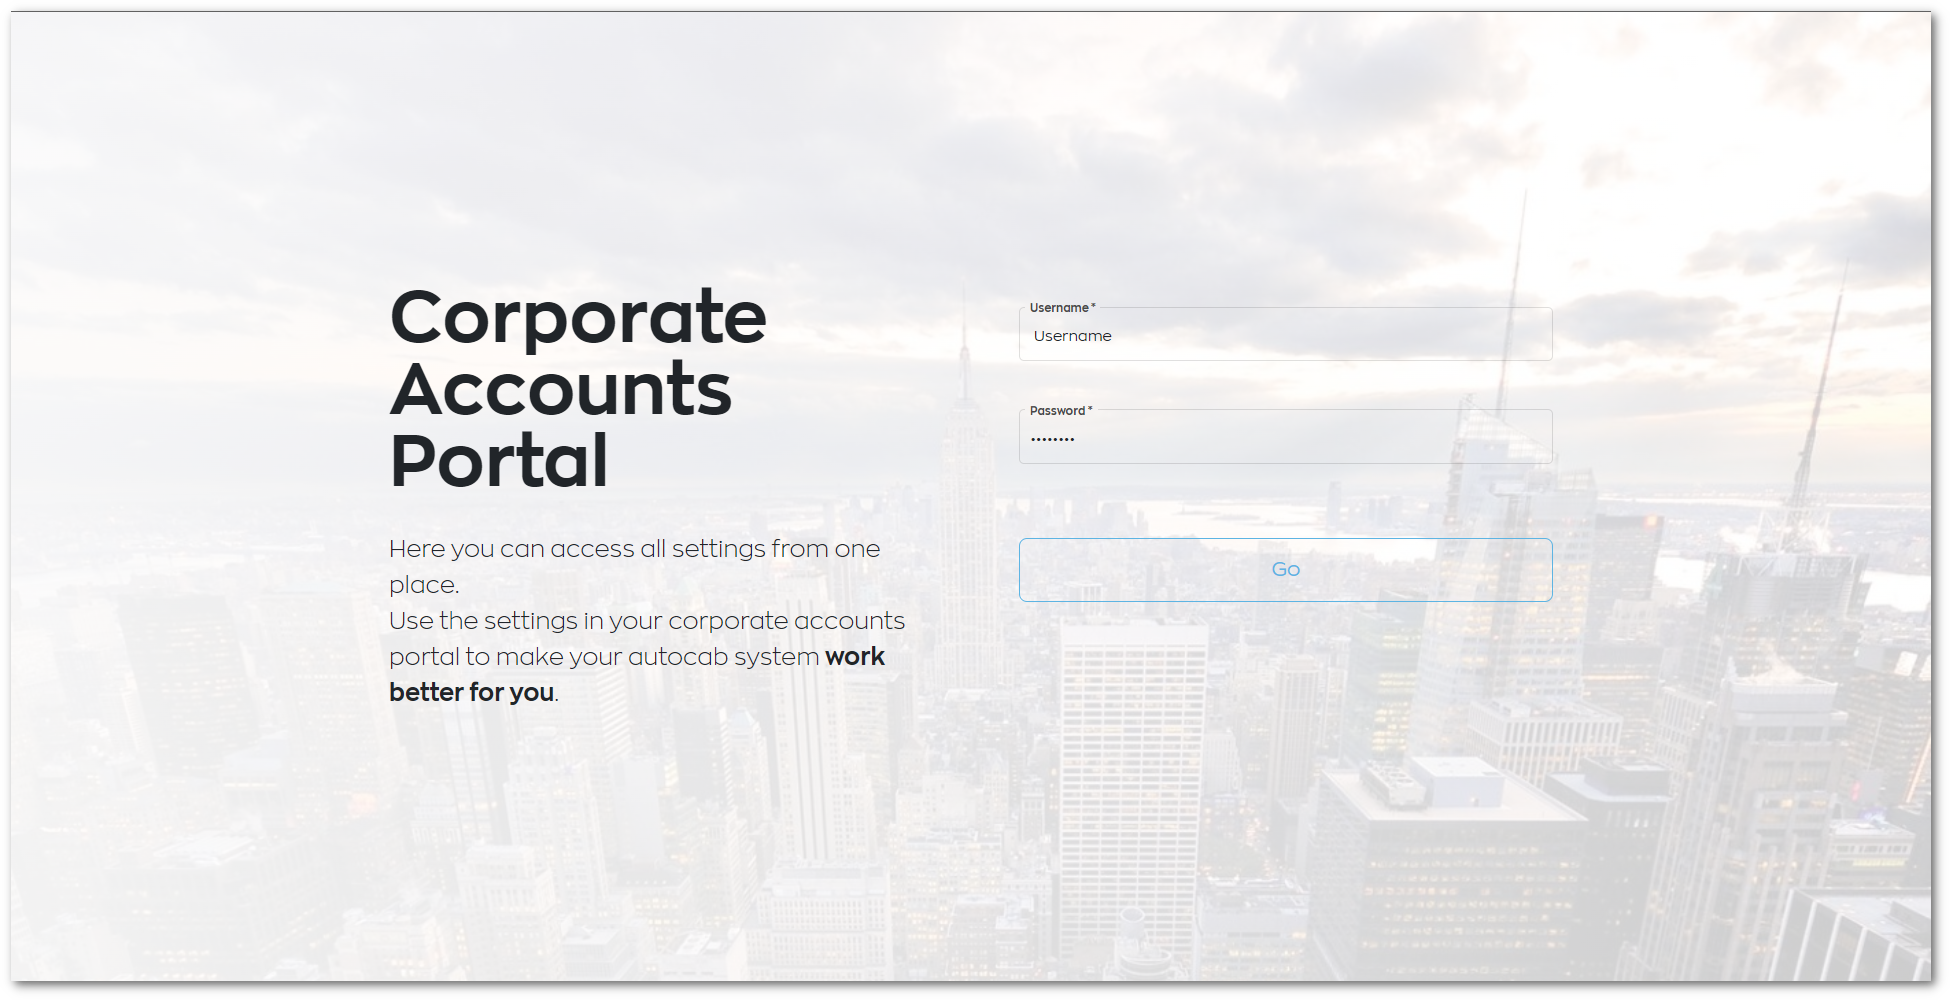
To login to the Accounts Portal:
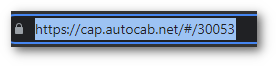
- Check the URL includes your Company ID.
Note: Your company ID should be prepended by the number 3 (e.g. 30053, 36125).
For example https://cap.autocab.net/#/30053.
- Enter your username (email) and the password you set.
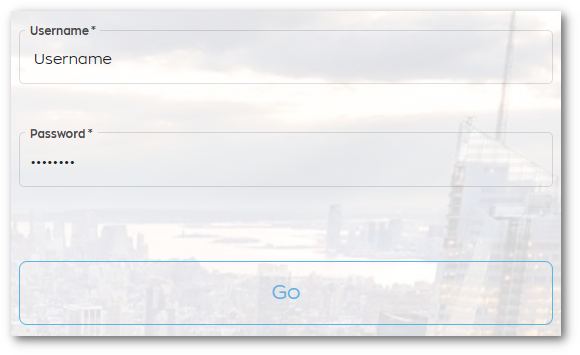
- Then click Go.
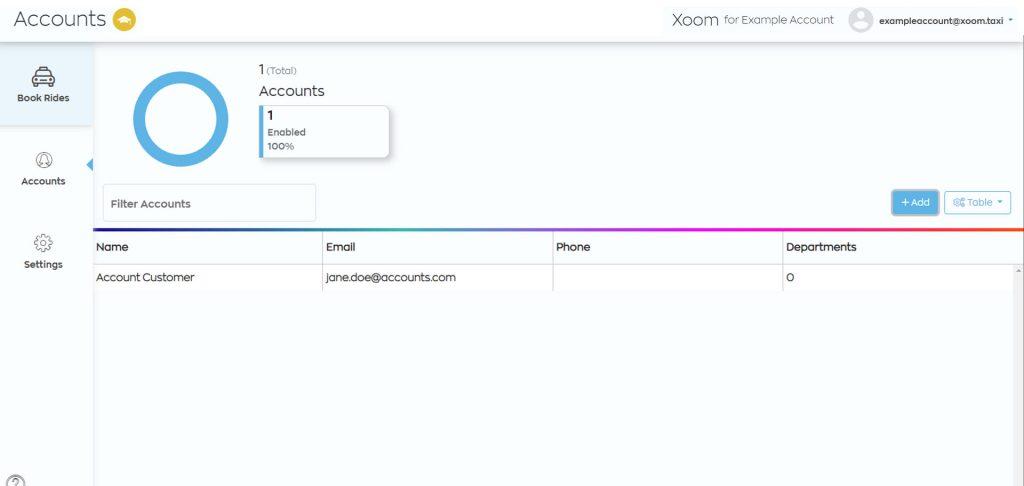
The first thing you will see once logged in is the Accounts screen. This of course will be empty the first time you visit it and below will explain how to create a new account.
![]()
Note: You have two choices with how to create accounts:
- A: Create a single "Master" account and include within this the customer groups.
- B: Create multiple accounts for the same customer by splitting up the groups into their own accounts.
For example, you may have a university account and set up the accounts as:
- A: Manchester University, access the account, then add the departments.
- B: Manchester University - Sports, Manchester University - Computing, Manchester University - Arts.
Adding an account
To add a new account:
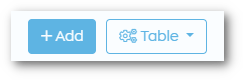
- Click on the Add button.
Enter the account details and set up the account:
Enabled/ Disabled: Click to enable the account.
Company Name: Enter the company’s display name (e.g. Manchester University).
Login Email: Enter the email address of the user managing this account.
Virtual Card Client ID: This allows you to add a virtual credit card ID.
Office Notes: Add any notes for this account.
Invoice Mode: Billing - Standard invoices will be issued, Credit Card - Passengers will be required to add a credit card before they can book jobs on the account.
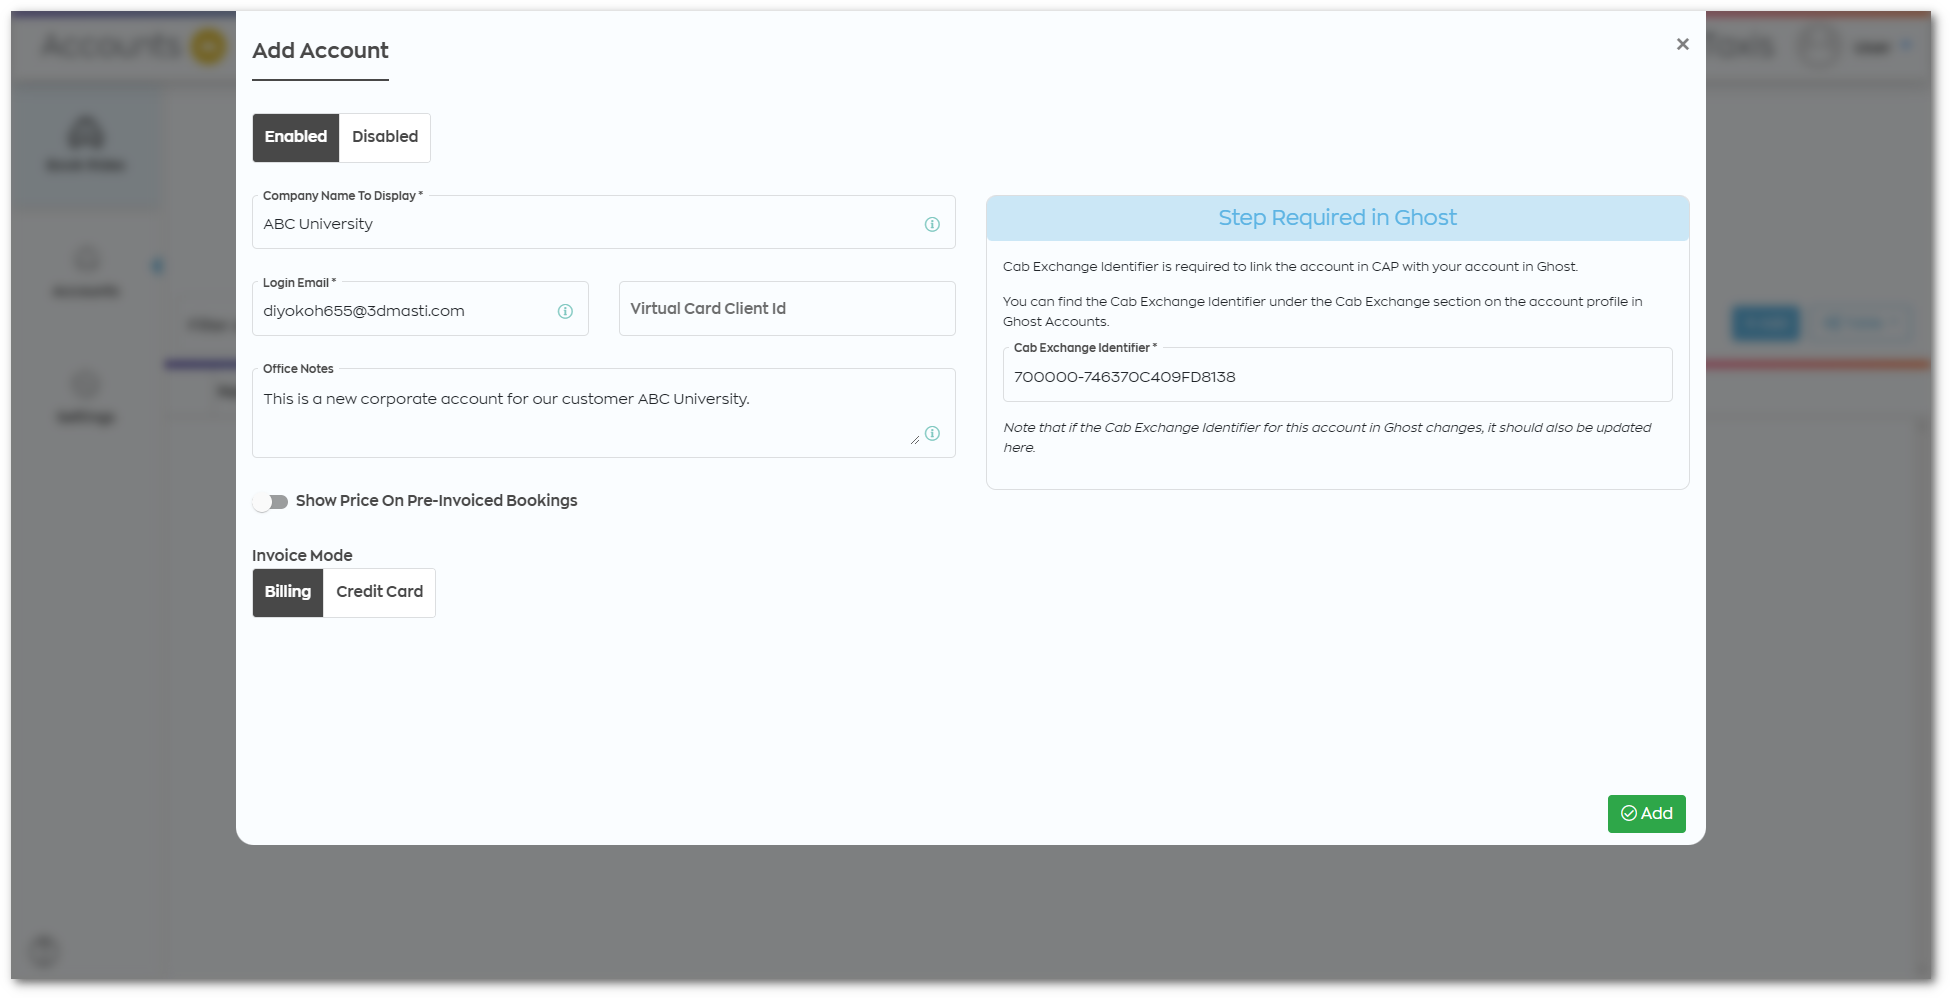
- Enter the company’s identifier code from their corporate account.
Note: The identifier code is required to link the account with your Ghost system and other products. - Then click to Add the new account.
An account activation email will be sent to the email address associated with the newly created account.
To access the new account:
- Double-click on the account.

- Then click Access Profile.
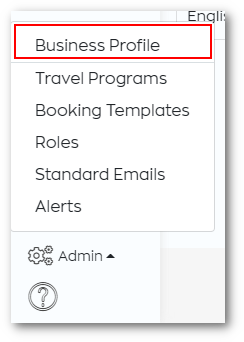
The Business Profile section is essentially where the details of an account are managed.
To access this section:
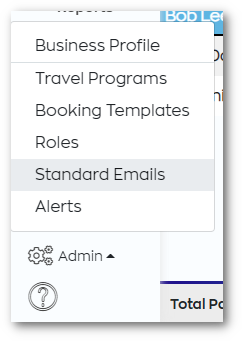
- Click on the Admin button in the bottom left-hand corner, and then click on Business Profile.
Note: You will first need to select an account and click on ‘Access Profile’ before you can see the 'Admin' button.
Details
The Details tab is where you can add the company details for an account.

Settings
The Settings tab allows you to configure the account settings, some being:
- Passcode Required: Is a passcode required for this account’s bookings?
- Hide Price On Booking Quotes: Toggle if the booking quote price should be shown.
- Show Disclaimer On eBooking: Toggle if a disclaimer should be shown or not on eBooking.
- Enable External Validation: If enabled, a URL can be entered that booking details are sent to while awaiting confirmation.

The next step is to configure the Travel Programs. These are sets of rules that can be created and applied to the Passengers and Groups.
The rules and restrictions may be location-based, time-based or vehicle capability-based (Check the next section 'Adding Booking Limits') and you can even set up allowances for spending and the number of rides (Check the next section 'Setting Allowances').
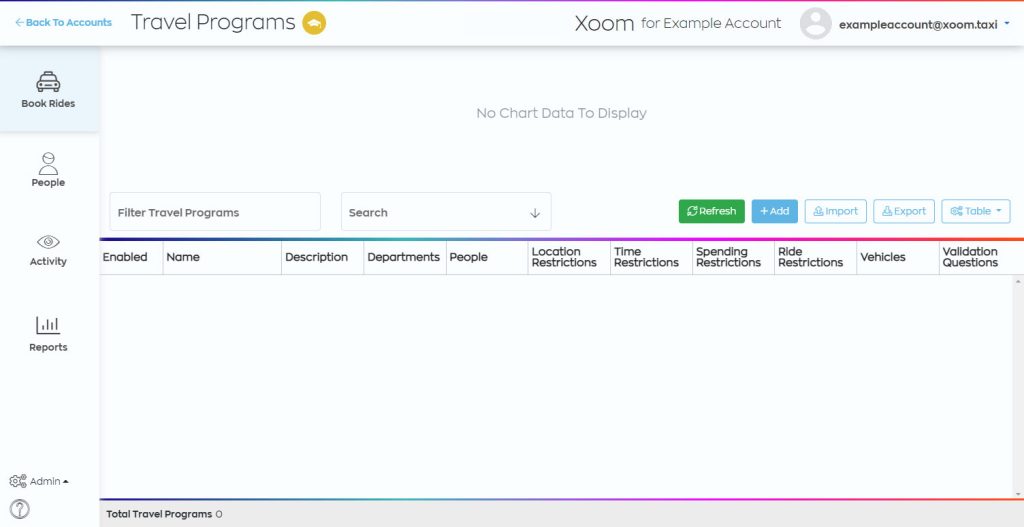
To access the Travel Program screen, click on the Admin button in the bottom left-hand corner, and then click on Travel Programs.
Adding travel programs
To add a new travel program:
- Click on the Add button.

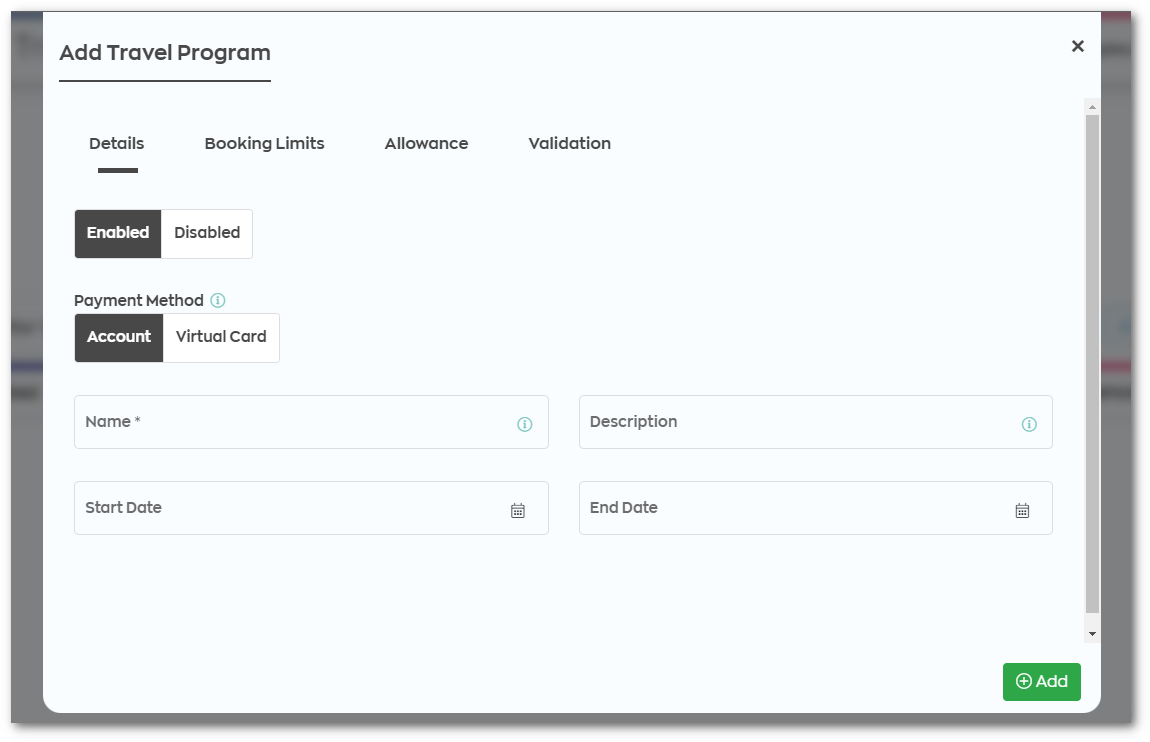
Details
This will then load the Add Travel Program popup and the Details tab. Here you can:
- Enable or Disable the travel program.
- Payment Method: Set the payment method that will be allowed for bookings using this travel program.
- Name: The name of the travel program.
- Description: The description of the travel program.
- Start/End Date: Set when the program should start and end.
If you are already in the process of adding or editing an existing Travel Program then skip to the Booking Limits part of this section, otherwise you can access the Travel Program screen by clicking on the Admin button in the bottom left-hand corner, and then click on Travel Programs.
Adding travel programs
To add a new travel program:
- Click on the Add button.
Next click on the Booking Limits tab.
Booking Limits
This is where you can set different types of booking limits for your travel program.
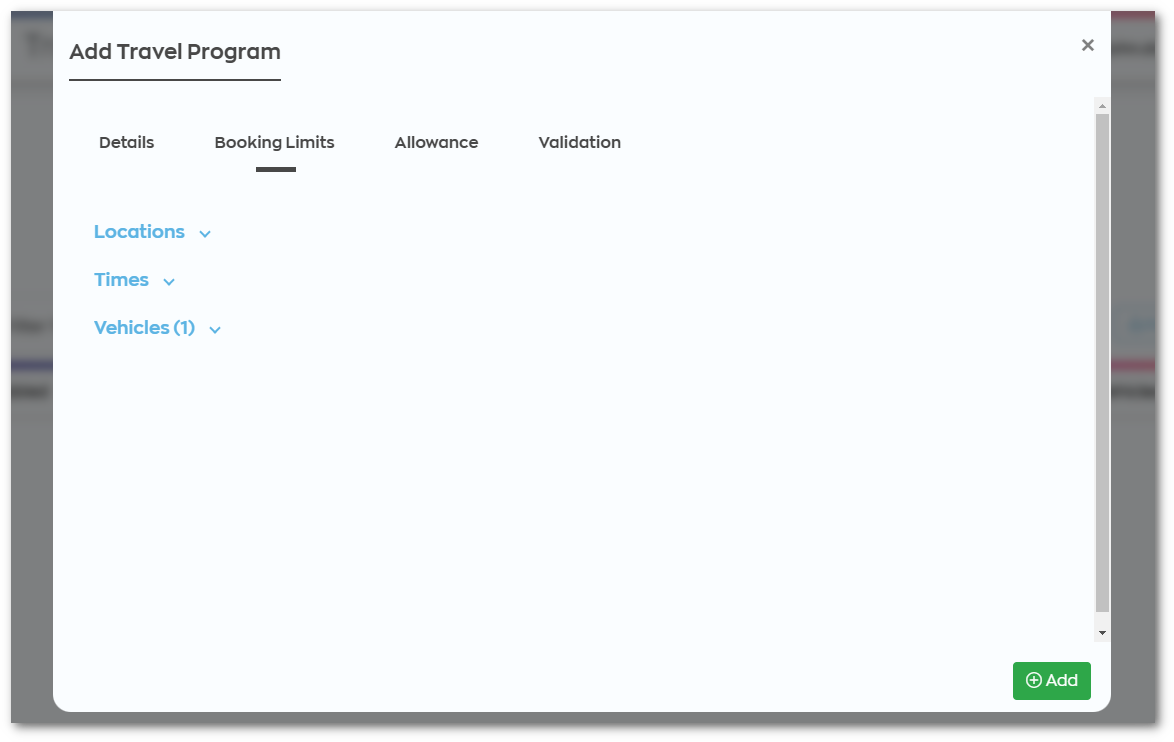
Locations
This booking limit allows you to restrict the locations where the travel program can be used.

To add a location restriction:
- Click on the Add button.

- Then configure the location:
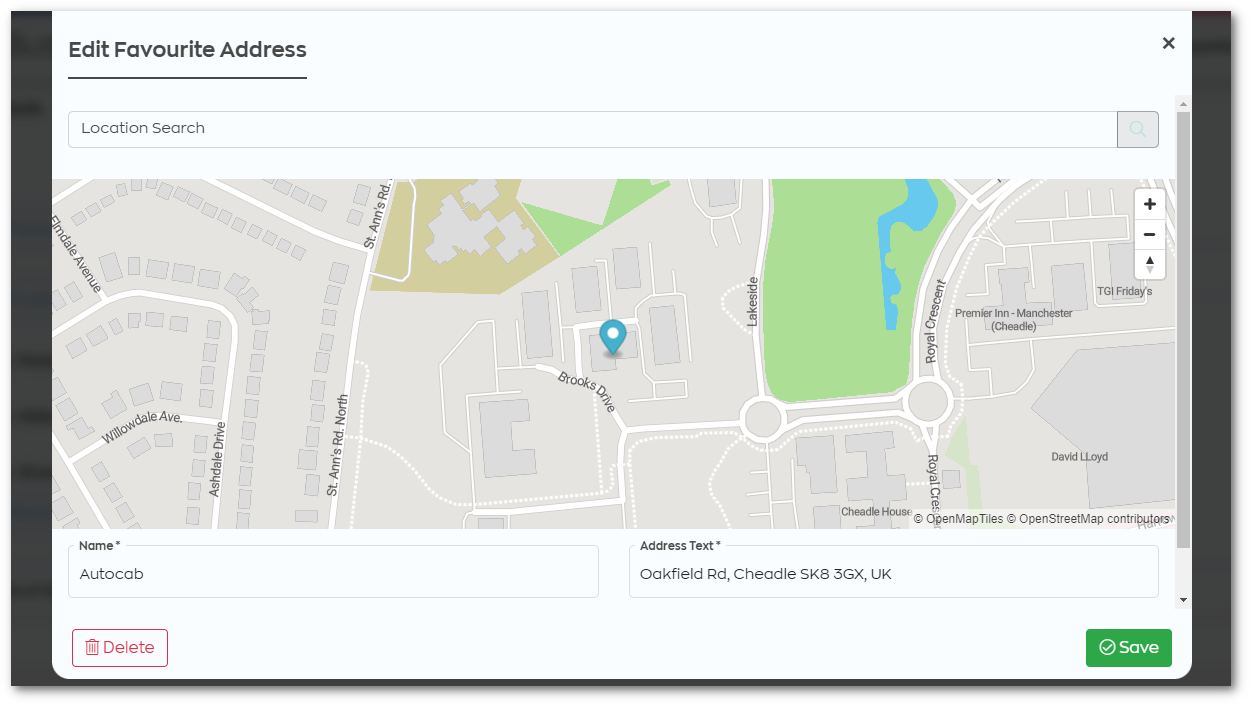
Location Search: Enter an address to search for it and set it as the location (or click on the map to set it manually).
Name: The name of the location.
Address Text: Here you can add additional address details.
Radius in Meters: The radius in which a travel program booking can be made within.
From/To: This can be used to set if the passenger can book from or to, from and to, or either for the given location.
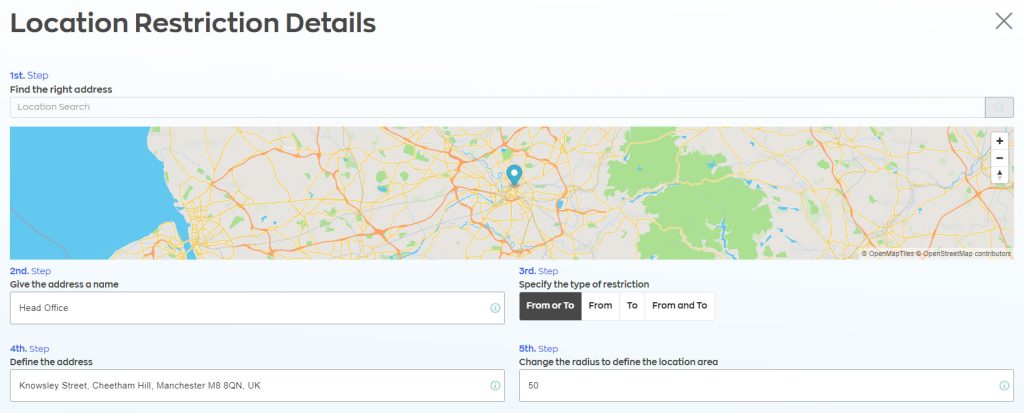
- Once configured simply click Confirm.

Times
This booking limit allows you to restrict the timeframes in which the travel program can be used in.

To add a time restriction:
- Click on the Add button.
- Then configure the timeframe:
Days: The days on which the travel program is available.
Start/End Times: The timeframe in which this travel program can be used.
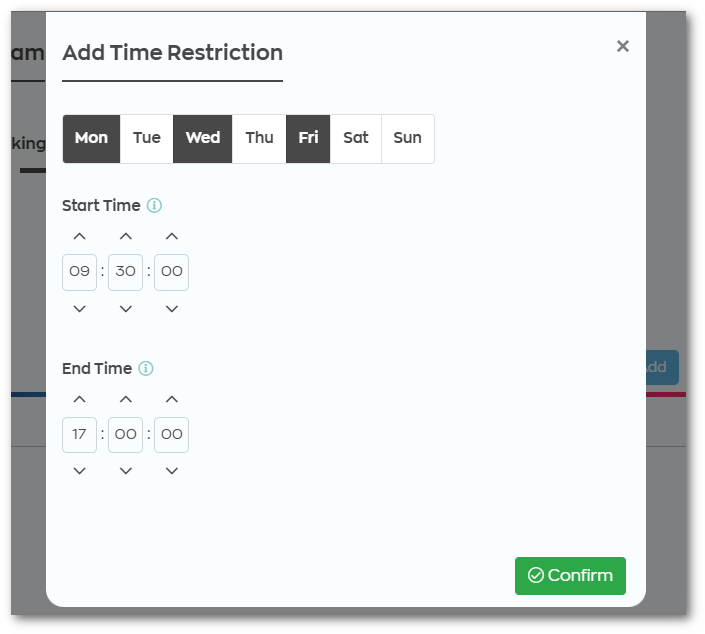
- Once configured simply click Confirm.

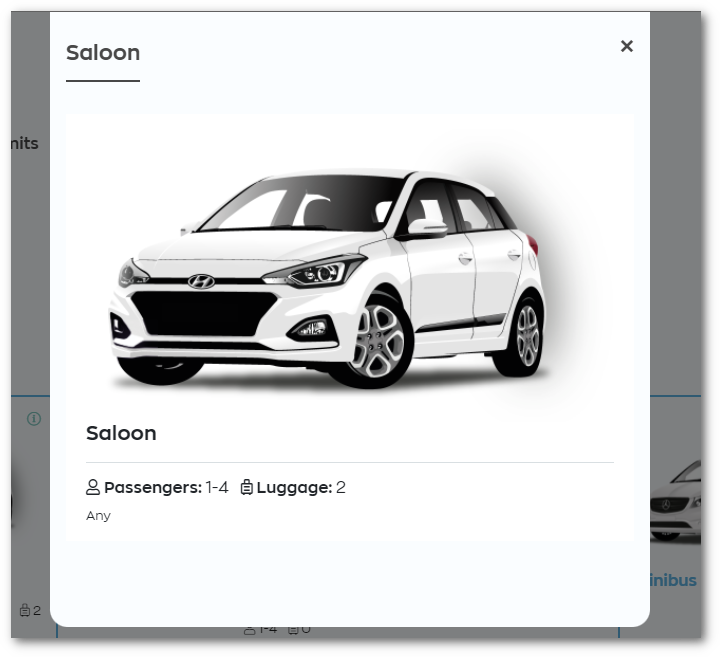
Vehicles
This booking limit allows you to restrict the vehicle type with which the travel program can be used.
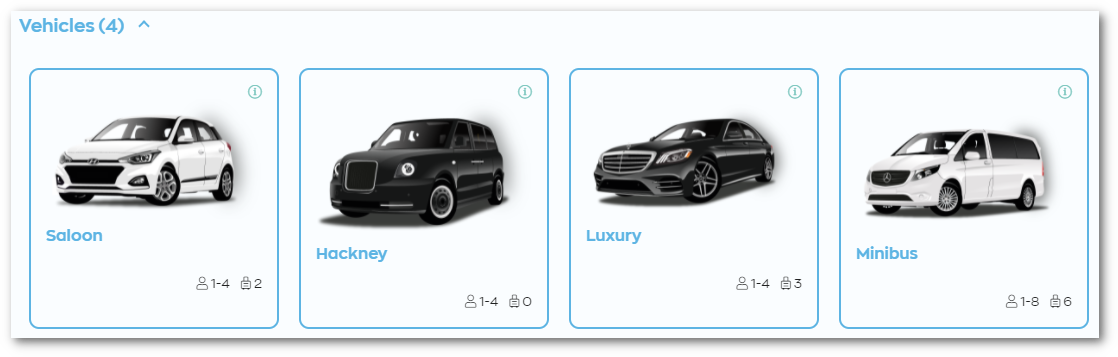
To set a vehicle restriction:
- Simply select or deselect a vehicle type.
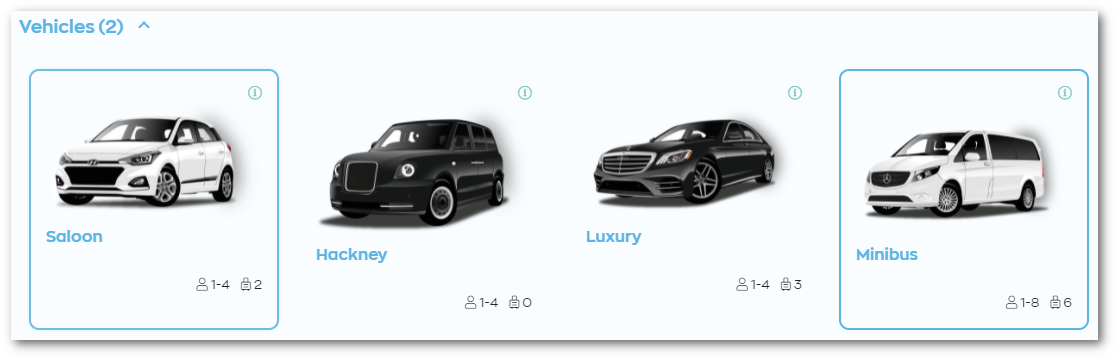
Note: You can also click the (i) icon to view the vehicle details.
Note: You can delete a booking limit by double-clicking on it and then clicking Delete.
This section allows you to set budgets and ride amounts for a travel program:
- Approval Only: Set if this travel program requires approval by an approver when booking.
- Require Manual Approval If Any Limit Is Surpassed: Set if approval is required if a passenger surpasses a limit.
- Allowance Type: Set if the allowance type is for individual passengers or shared between them.
- Spending Allowance: How much can be spent on this travel program.
- Amount: The monetary value.
- Type: The allowance reset frequency.
- Number of Rides Allowance: How many rides can be booked on this travel program.
- Rides: The number of rides.
- Type: The allowance reset frequency.

You will now want to add the passengers to the account.

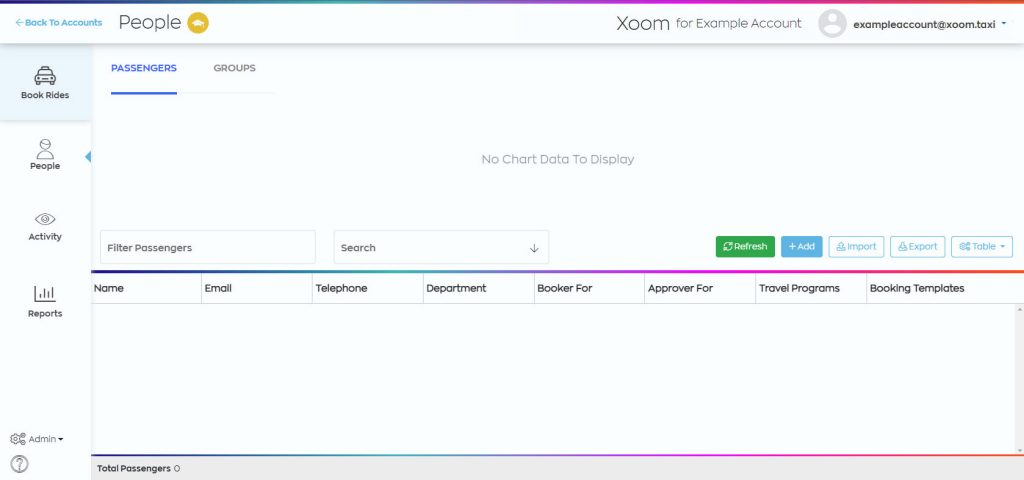
This screen can be accessed by clicking on People from the left-hand menu and then clicking on the Passengers tab.
Adding a passenger
To add a new passenger:
- Click on the Add button.

- Enter the passenger details.
Note: You won't be able to select any Travel Programs (See the above section 'Adding Travel Programs') or Booking Templates (See the section 'Setting up Booking Templates' in the Advanced Tools User Guide further down this page) unless you've already set them up, and Bookers, Approvers, and Managers can only be selected after adding passengers to an account.
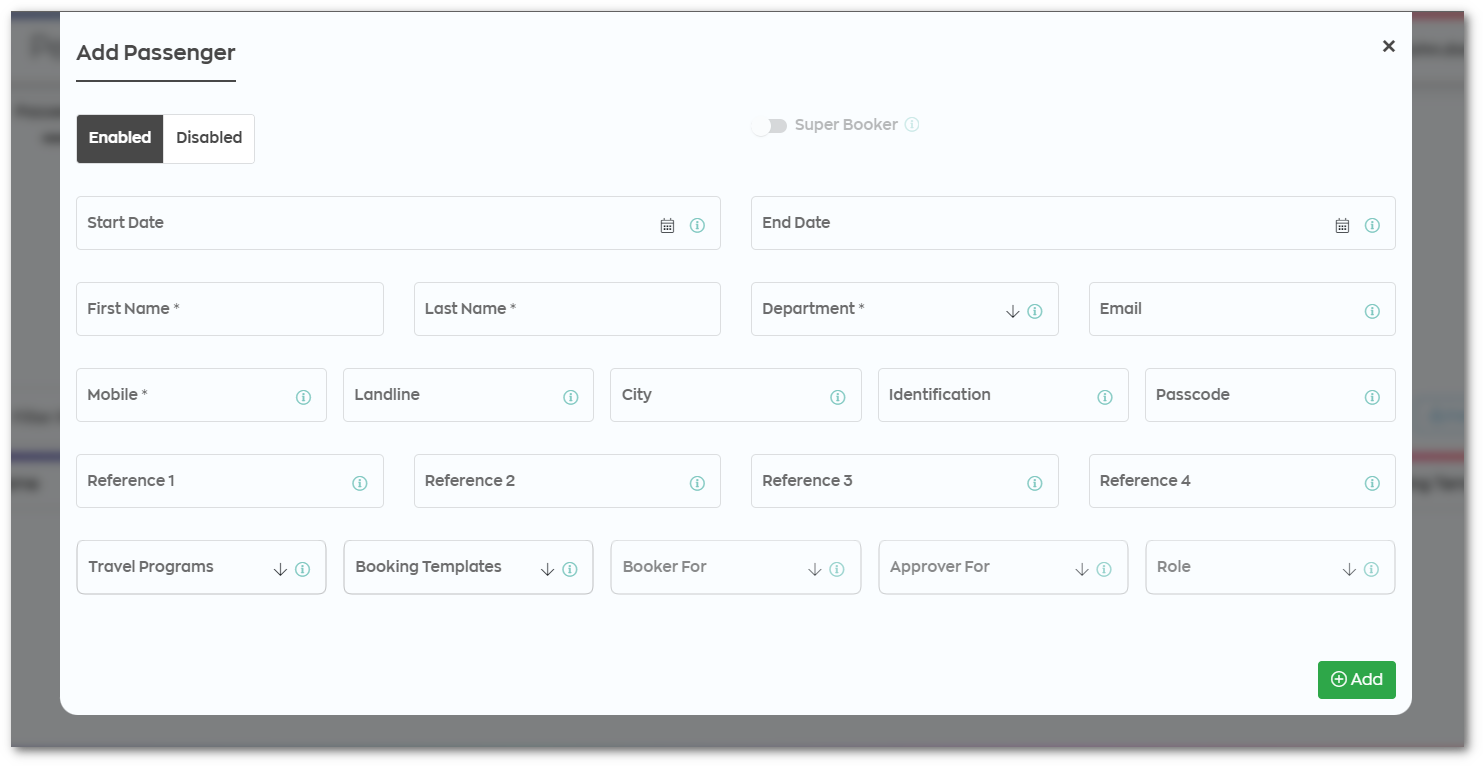
- Then click Save.
An account activation email will be sent to the email address associated with the newly created passenger.
The Standard Emails section is where you can configure the emails that are sent out from the Corporate Accounts Portal.
Note: There should be default email templates setup, and in most cases you should just need to check that they are okay, however if you want to edit them the below will help you: 
To access this section:
- Click on the Admin button in the bottom left-hand corner, and then click on Standard Emails.
Note: You will first need to select an account and click on ‘Access Profile’ before you can see the 'Admin' button.
Configuring Standard Emails
To configure an email:
- Click on an email from the Email Types list.
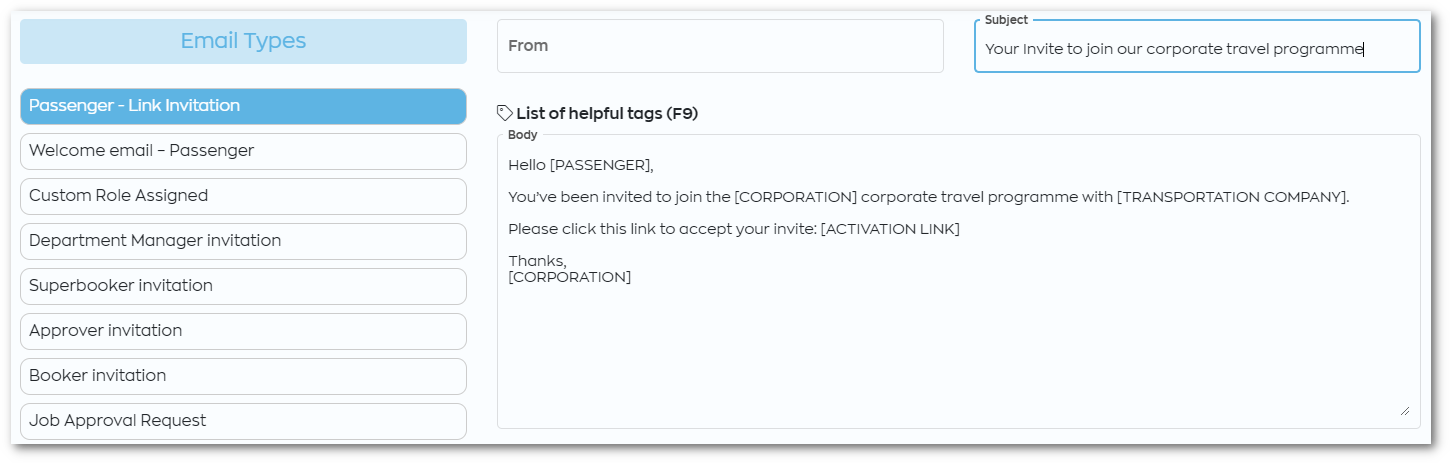
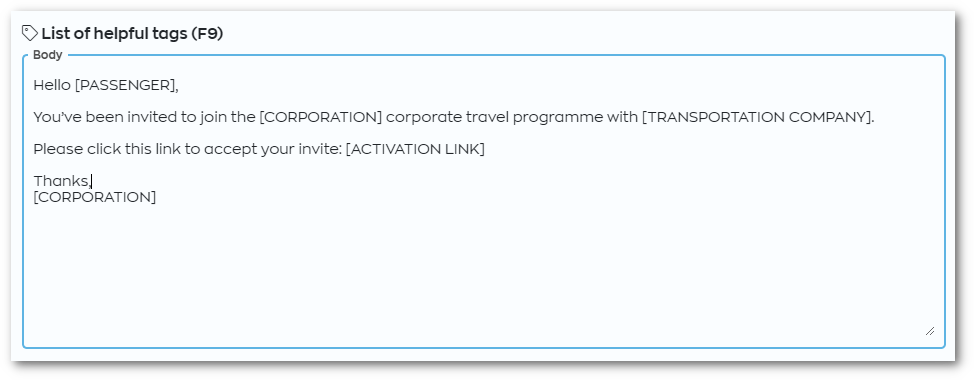
Note: There is a default Subject and Body for each of the Email Types, however, these can be customised to suit your needs. - Write your custom message in the Subject and Body fields.
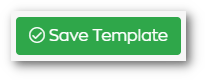
- Then click Save Template.
Now when a new passenger is invited to the Corporate Accounts Portal, they will receive an email with an activation link that can be clicked to accept the invite.
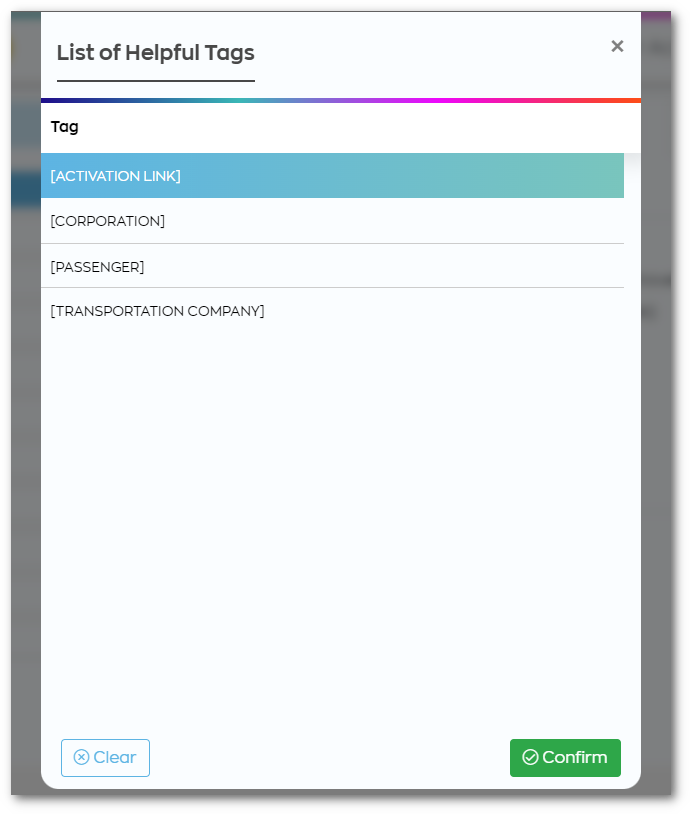
Note: You can also add tags to the emails by pressing F9, selecting them from the list, and then clicking Confirm.
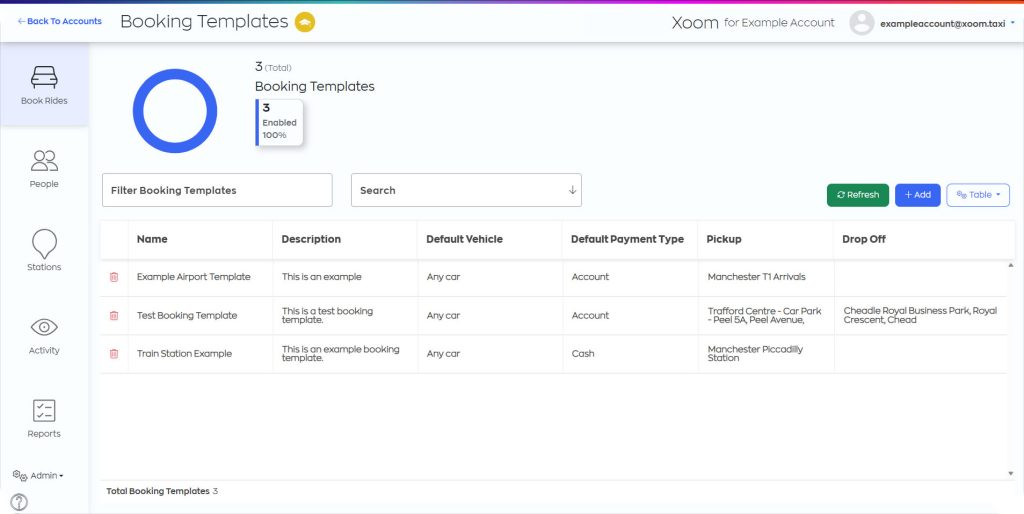
The Booking Templates section is where you can create booking templates that allow passengers to quickly book journeys they may require multiple times a day, week or month.
To access this section:
- In the portal, you must first select an account under Accounts and select the Access Profile button.
- Now in your account, click on the Admin button in the bottom left-hand corner, and then click on Booking Templates.
Once in the Booking Templates section, you can proceed to add a new template or make changes to an existing one.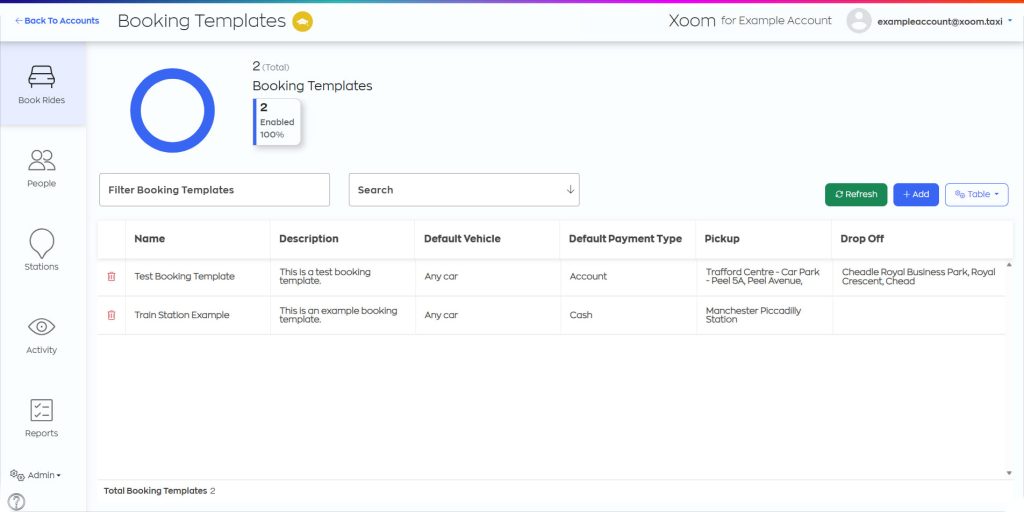
If you have not created a template previously, a landing page appears, from this select the button to Add Booking Template. Otherwise, click on the blue Add button.
Name Section
The first step in creating your template is the Name section. There are eight total sections you can configure.
- Enter a suitable name in the Booking Template Name field to ensure it can be easily found.
- Provide an applicable description so others using your template understand its use.
Time Section
In this section, you can control when bookings can be scheduled. By enabling Limit scheduling bookings, all bookings made through your E-Booking system are restricted to ASAP only, benefitting operations that require urgent transportation needs by simplifying the booking process.
- To enable Limit scheduling bookings, click the toggle button to turn the setting on.
Addresses Section
Here you can add a predefined pickup address and/or a predefined destination address to your template, restricting the location of where the car can pick up and/or drop off a passenger.
- To add a pre-configured pickup location, toggle on the option Predefined pick up address. This opens up some more options to fill in.
- To add a predefined pickup address, follow these steps:
- Use the text box to search for the pickup address.
- Give a sensible name to the address, so that it's easy for the driver to identify.
- Use the map to drag the marker to the exact location of the pickup address.
- (Optional) If you have any extra information that the driver needs to know, such as a maximum waiting time in the area, toggle on the option to open a text box and enter the information.
- To add a predefined pickup address, follow these steps:
- To add a predefined destination address, turn on Predefined destination address and fill out the required information as described above.
Extra Info Section
This section can be used to add any information the driver may need to know about the trip.
- Toggle on the Add note to driver setting.
- Add the necessary information into the textbox under Add driver note.
Passenger Section
You can configure specific passenger information in this section, adding details to the booking that will be automatically saved and shared with the driver, speeding up the booking process.
There are three options to choose from:
- The Logged-in User: By selecting this option, the system will automatically use the information of the currently logged-in user in E-Booker as the passenger for the booking. This is a convenient choice for Account Portal users. However, if the template is used by other users, it will require them to provide passenger details.
- A Pre-Set Information: Enabling this option allows you to specify a fixed set of passenger information for bookings. This is useful when the booker doesn't always have the actual passenger's name and details at hand or when generic information is preferred for bookings. For this, you need to enter the passenger's name, contact phone number and email address in the relevant input boxes.
- Always Ask For the Details: When this option is activated, the system will prompt users to enter passenger information each time they make a booking, ensuring that passenger details are provided for every reservation.
Vehicles Section
Within this section, you can determine the vehicles available for selection when utilising this booking template.
- Enable the Must enter number of passengers and luggage option to require the booker to specify the number of passengers and bags. Depending on your vehicle configurations, this requirement will influence the available vehicle options for the passenger's selection.
- Choose a default vehicle option for this template, ensuring that your preferred vehicle is pre-selected unless otherwise specified.
- To exclude specific vehicles from this booking template, simply toggle them off. This will result in your chosen vehicle being displayed in a greyed-out state.
Payment Section
In this section, you can specify the available payment methods for selection when using this booking template. If you designate Account as the Default Option, you have the option to apply a travel program to the payment that will always be used.
- To enable a payment method, toggle the switch next to the desired payment option. The method is considered enabled when the toggle turns green.
- Select your preferred default payment method by clicking the Make Default button adjacent to your chosen method.
- If you've designated Account as your default payment option, you can enable the use of a travel program. To add a program, access the dropdown menu and make your selection. Keep in mind that this choice will deactivate the card and cash payment options.
Post-Booking Section
The final section to set up is the Post-Booking options, which are presented to the passenger after they have completed their booking. Here, you can customise settings for enabling return bookings and permitting multiple bookings.
- To allow passengers the option of booking a return journey after making their initial reservation, enable the Allow return bookings parameter. Once activated, the booker will find an option to book a return journey on the confirmation page of their booking.
- By enabling the Allow multiple bookings setting, the booker gains the ability to make multiple identical bookings if desired. This option to book the same journey is also presented on the confirmation page of their booking.
Create the Template
After you've completed the configuration of all the required sections for your desired template, click the Create Booking Template button to finalise the creation of your template.
Subsequently, you'll be able to view your newly created template in your list on the Booking Templates screen.
Linking Template to a Passenger
You can then proceed to link your template to a passenger, so every time they book, the template and the subsequent details are automatically loaded.
To link a template:
- Back in your account, navigate to the People tab and open the passenger you wish to link to the booking template.
- Open the Booker tab.
- Under Booking Templates, use the dropdown menu to select a template.
- Make sure to Save your changes to apply the template.
Upon completion of this process, the booking template becomes accessible to the passenger (if they are logged in) within your E-Booker interface, accessible under the Quick Book section.
Upon template selection, the booking form is automatically populated with all the information gathered from the chosen template, streamlining the booking process for a seamless and efficient experience.
Modifying a Template
You can edit a template at any time by double-clicking. This opens the Template editor, where you can make changes. Ensure to save to apply any modifications.
To delete a template, use the Delete () button. A confirmation pop-up will appear, where you can confirm your choice by selecting the I'm Sure button to proceed.
The Roles section is where you can set up permissions for the users of your Corporate Accounts Portal.
For example, you can allow an admin user to add, delete, edit and view data in each section, but only allow normal users to view and edit.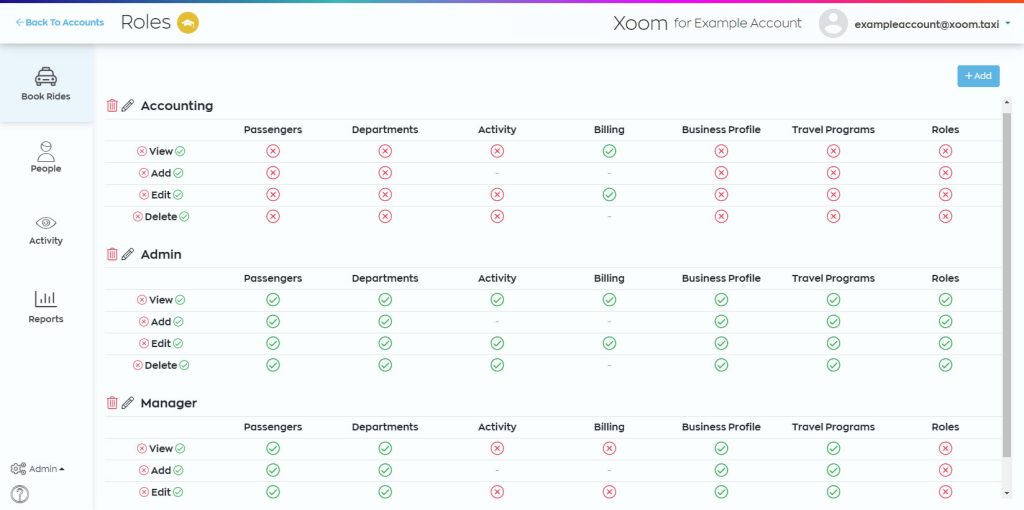
To access this section:
- Click on the Admin button in the bottom left-hand corner, and then click on Roles.
Note: You will first need to select an account and click on ‘Access Profile’ before you can see the 'Admin' button.
Adding user roles
To add a new user role:
- Click on the Add button.
- Enter a Name for the role.
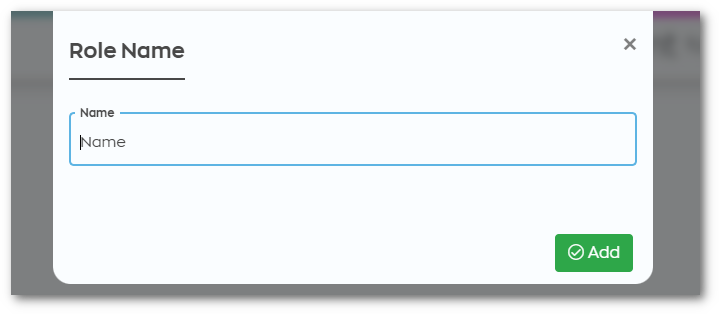
- Then click Add.

Note: By default, the new user role will have all the permissions disabled.
Changing role permissions
To change the role permissions:
- Simply click on the (x) or (tick) icons to enable and disable each permission:
View: The user will be able to view records in each table
Add: The user will be able to add new records to each table
Edit: The user will be able to edit existing records in each table
Delete: The user will be able to delete records in each table
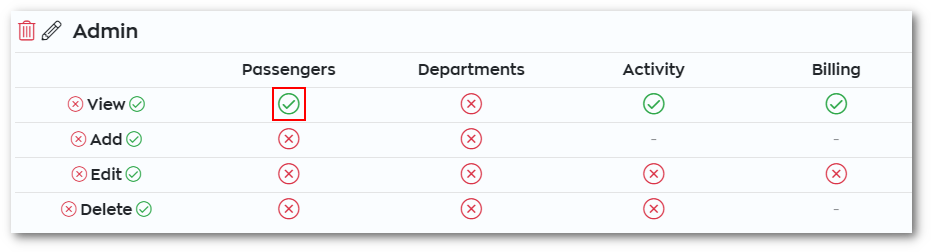
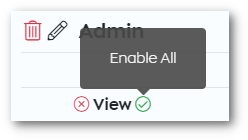
You can also click on the left-hand icons to enable/disable all permissions.
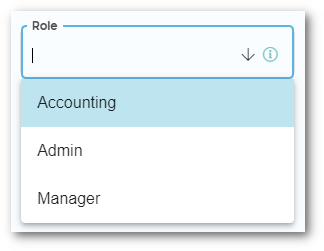
Note: You can also edit the name or delete the role using the top-left icons.
Set User Role
Note: You will need to set a Role as a default on a users' account details.
You can create Groups to add Passengers too.
This screen can be accessed by clicking on People from the left-hand menu and then clicking on the Groups tab.
Adding a Group
To add a new Group:
- Click on the Add button.
- Enter the Group details:
Enabled/ Disabled: Click to enable or disable the group.
Name: Enter the group name (e.g. Finance).
Description: Provide a short description to describe the group.
Travel Programs: Select any travel programs that should apply to the group.
Booking Templates: Select any booking templates to be shown on the group.
Bookers: Select any passengers that can place bookings through the group.
Approvers: Select any passengers that can approve bookings made by bookers.
Managers: Select any passengers that can access and manage the group.
Note: You won't be able to select any Travel Programs (See the above 'Adding Travel Programs' section in the Getting setup & started user guide) or Booking Templates (See the above 'Setting up Booking Templates' section) unless you've already set them up, and Bookers, Approvers, and Managers can only be selected after adding passengers to an account.
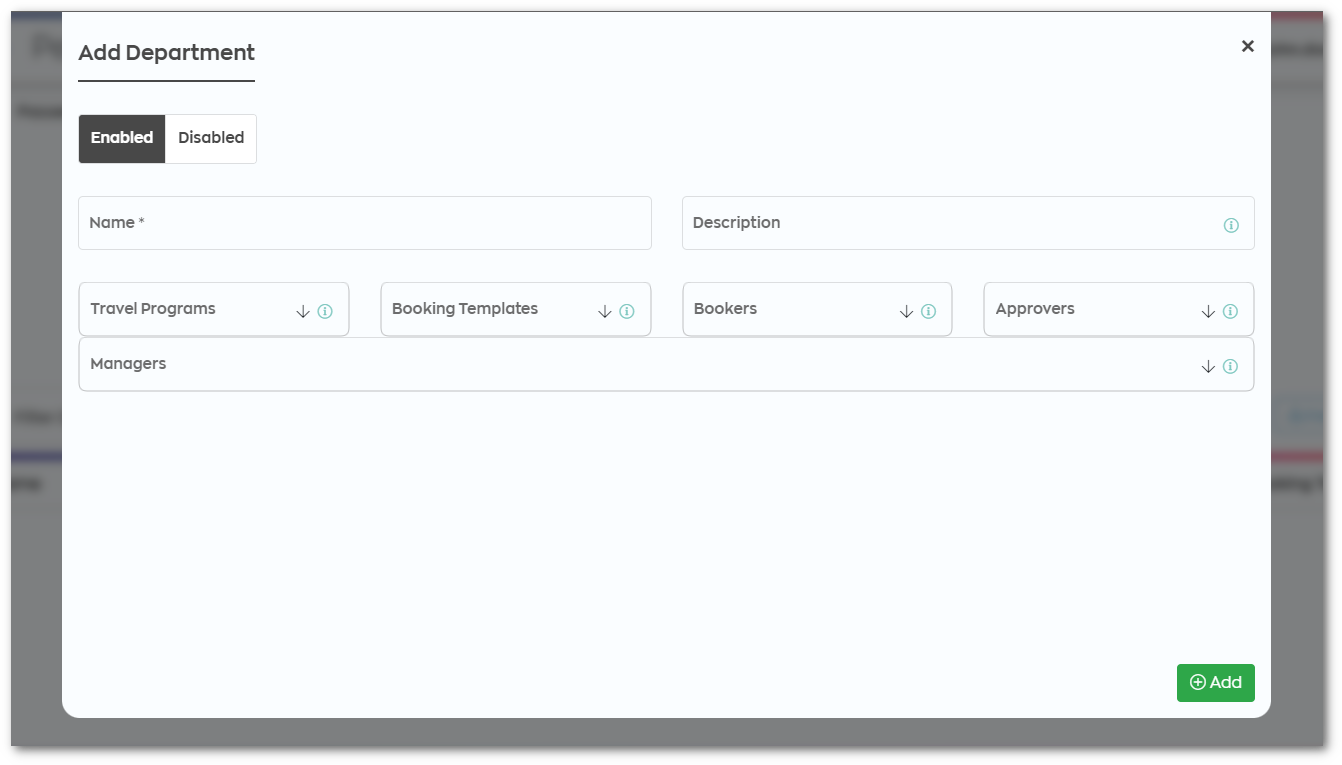
- Then click Save.
To setup Favourite Addresses which will speed up booking processes for places you use regularly, you need to head to your Business Profile:
- Click on the Admin button in the bottom left-hand corner, and then click on Business Profile.
Note: You will first need to select an account and click on ‘Access Profile’ before you can see the 'Admin' button.
To add a favourite address:
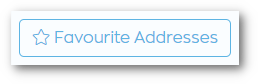
- Click on the Favourite Addresses button.
- Click on the Add button within the Favourite Addresses popup.

- Enter an address and give it a name.

- Then click Save to add it to the list.

To edit or delete a favourite address:
- Simply double-click on an address from the list.
- Then change the details and click Save, or click Delete.
Note: If you're a non-admin without the 'Edit' permission, then you will still be able to view the 'Favourites' and 'Disclaimer' but not edit them.
The Alerts section is where you can view and configure custom alerts for your travel programs.
This is useful for keeping track of which users have exceeded set allowances or a specific percentage of their allocated budget.
Note: Before any alerts will show on the Alerts tab, you must first set up alerts in the Configure Alerts tab.
To access this section:
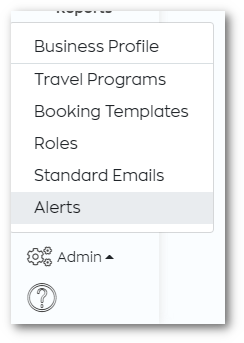
- Click on the Admin button in the bottom left-hand corner, and then click on Alerts.
Alerts
The Alerts tab is where you can view alerts when they are triggered. 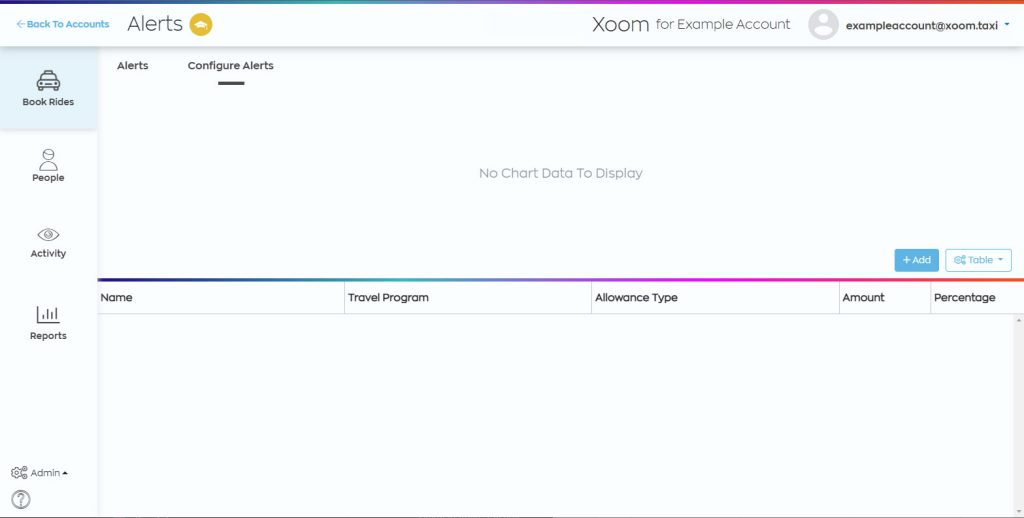
If an alert is triggered the table will be populated:
- Delete: To delete an alert click on the left-hand (Trash) icon.
- Read / Unread: An alert can be marked as read or unread by clicking on the (Cross / Tick) icon to toggle the status.

Note: Alerts will only show in this tab and will not be shown with any notifications or popups.
Configure Alerts
The Configure Alerts tab is where you can configure the alerts to be displayed.
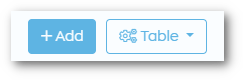
To add a new alert:
- Click on the Add button.
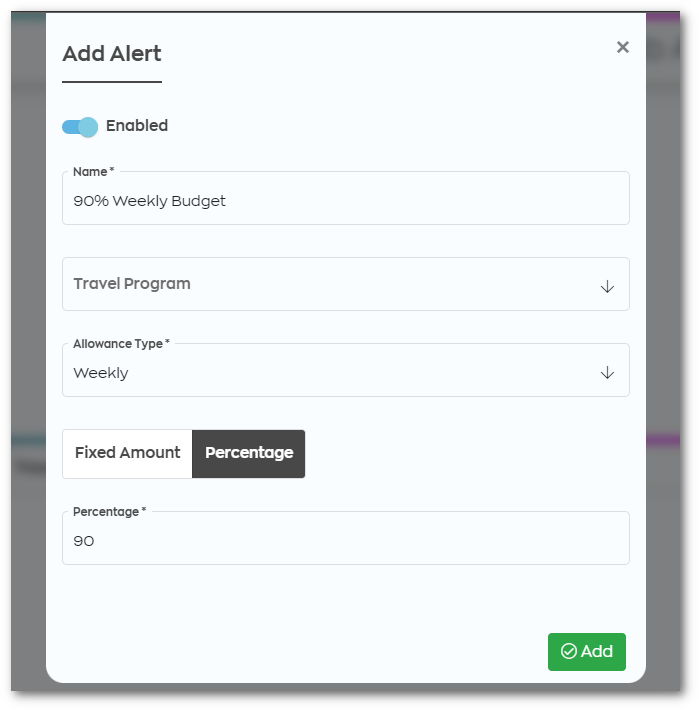
Configure your custom alert.
For example, here we have named our alert “90% Weekly Budget“, set the Allowance Type to “Weekly“, value as Percentage, and the Percentage to “90“. This means that if the weekly allowance exceeds 90% of its set limit, you will now get an alert within the Alerts section.
- Then click Add to save the alert.

Note: Without selecting a Travel Program, this alert will now apply to every program. However, you may choose to set alerts to specific travel programs of your own.